|
2kiters The Pear Top Project |

|
2kiters The Pear Top Project |
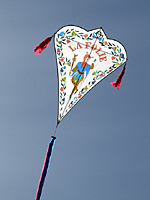
| This is another one of our replica kite projects. We took an lovely, old kite and converted it to our modern materials. The original French Pear Top kites we based this project on were from the late 1800's and were commercially available kites. They were about 2 feet tall and made from silk. Our replicas are about 7 feet tall. The Pear Tops have the traditional "Eddy waggle" while they fly. |
|
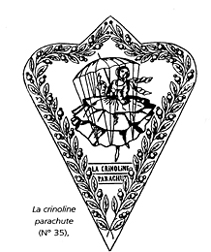
Our first step is to find a suitable photo or drawing to make a pattern from. I used a horrible little picture from an eBay auction for our first Pear Top (look here). We later found the French book cahiers 2, au fil des vents. It contains many of the Pear Top kites, some have drawings and some original photos, some are in color. It is a wonderful book. For an appliquéd kite, I normally must simplify the original. Photos 1 and 2 show how many of the leaves and berries I removed from the border. |
 photo 1 |
photo 2 |
|
Next steps... The cleaned up drawing is transferred to a transparency and we use our overhead projector to enlarge the drawing to the proper size, in this case that is about 7 feet tall. We transfer the design onto paper and make another transfer to white ripstop nylon fabric or (infrequently) directly to the fabric. If you are unsure about what I am talking about, read through my appliqué article. Questions are welcome! Colors are chosen, fabric layered and secured, all lines are stitched, and extra layers cut away. The actual kite shape is then cut out. I fold the fabric in half lengthwise and cut it out, giving a symmetrical shape side to side.
|
Bob tells me about anything special he will need on the kite to
make the skin into a durable, good flying kite. For example, I need to know how
he wants the spine to be attached to the skin so I can put the proper loops or
strings on and the
|
After I finish with the skin, Bob makes the rods and does the bridle. In the Pear Tops, he has used thin fiberglass rods going into a bent brass tube at the spine for the curved edges. They are contained in a sleeve along the curved edge and end in pockets. The second spreader rod is also fiberglass. It is in two pieces for easy transport. It goes straight across the widest point of the kite. There are arrow nocks on the ends which go into loops. The spine is carbon. A stiff spine helps control the "Eddy wiggle" The top bridle point is just under where the spreader crosses the spine. He used strips of bicycle tire inner tubes for the ties. They won't come undone in the air! The kite is not bowed. Below are photos I took of the back of the finished kite. The tails are very long and each kite has three, 2 red and a blue. |
 |
Simple rods: 1. Spreader for the curved edges. 2. Spreader the width of the kite. 3. Spine. |
|
 |
← Curved edge spreader rod (black) and pocket which is red 4 ounce Dacron. The second spreader rod (purple rod) is hooked into a loop which is simply lark's headed to the black rod. The purple rod rests on the curved spreader. → ← The tassel and swivel is attached to the loop or purple rod. |
|
|
Replica Nous Irons Conquérir La Lune (We will Conquer the Moon) |
Replica La Crinoline Parachute |
Replica La Folie (The Fool)  |